Migrating from Snowflake
In this tutorial, we'll walk you through the process of exporting data from Snowflake in Parquet format to an Amazon S3 bucket, and then loading it into Databend Cloud.
Before You Start
Before you start, ensure you have the following prerequisites in place:
- Amazon S3 Bucket: An S3 bucket where your exported data will be stored, along with the required permissions for uploading files. Learn how to create an S3 bucket. In this tutorial, we use
s3://databend-doc/snowflake/as the location for staging the exported data. - AWS Credentials: AWS Access Key ID and Secret Access Key with sufficient permissions for accessing the S3 bucket. Manage your AWS credentials.
- Permissions to Manage IAM Roles and Policies: Ensure you have the necessary permissions to create and manage IAM roles and policies, which are required to configure access between Snowflake and Amazon S3. Learn about IAM roles and policies.
Step 1: Configuring Snowflake Storage Integration for Amazon S3
In this step, we'll configure Snowflake to access Amazon S3 using IAM roles. First, we'll create an IAM role, and then use that role to establish a Snowflake Storage Integration for secure data access.
- Sign in to the AWS Management Console, then create a policy on IAM > Policies with the following JSON code:
{
    "Version": "2012-10-17",
    "Statement": [
        {
            "Effect": "Allow",
            "Action": [
              "s3:PutObject",
              "s3:GetObject",
              "s3:GetObjectVersion",
              "s3:DeleteObject",
              "s3:DeleteObjectVersion"
            ],
            "Resource": "arn:aws:s3:::databend-doc/snowflake/*"
        },
        {
            "Effect": "Allow",
            "Action": [
                "s3:ListBucket",
                "s3:GetBucketLocation"
            ],
            "Resource": "arn:aws:s3:::databend-doc",
            "Condition": {
                "StringLike": {
                    "s3:prefix": [
                        "snowflake/*"
                    ]
                }
            }
        }
    ]
}
This policy applies to the S3 bucket named databend-doc and specifically to the snowflake folder within that bucket.
s3:PutObject,s3:GetObject,s3:GetObjectVersion,s3:DeleteObject,s3:DeleteObjectVersion: Allows operations on objects within the snowflake folder (e.g.,s3://databend-doc/snowflake/). You can upload, read, and delete objects in this folder.s3:ListBucket,s3:GetBucketLocation: Allows listing the contents of thedatabend-docbucket and retrieving its location. TheConditionelement ensures that listing is restricted to objects within thesnowflakefolder.
-
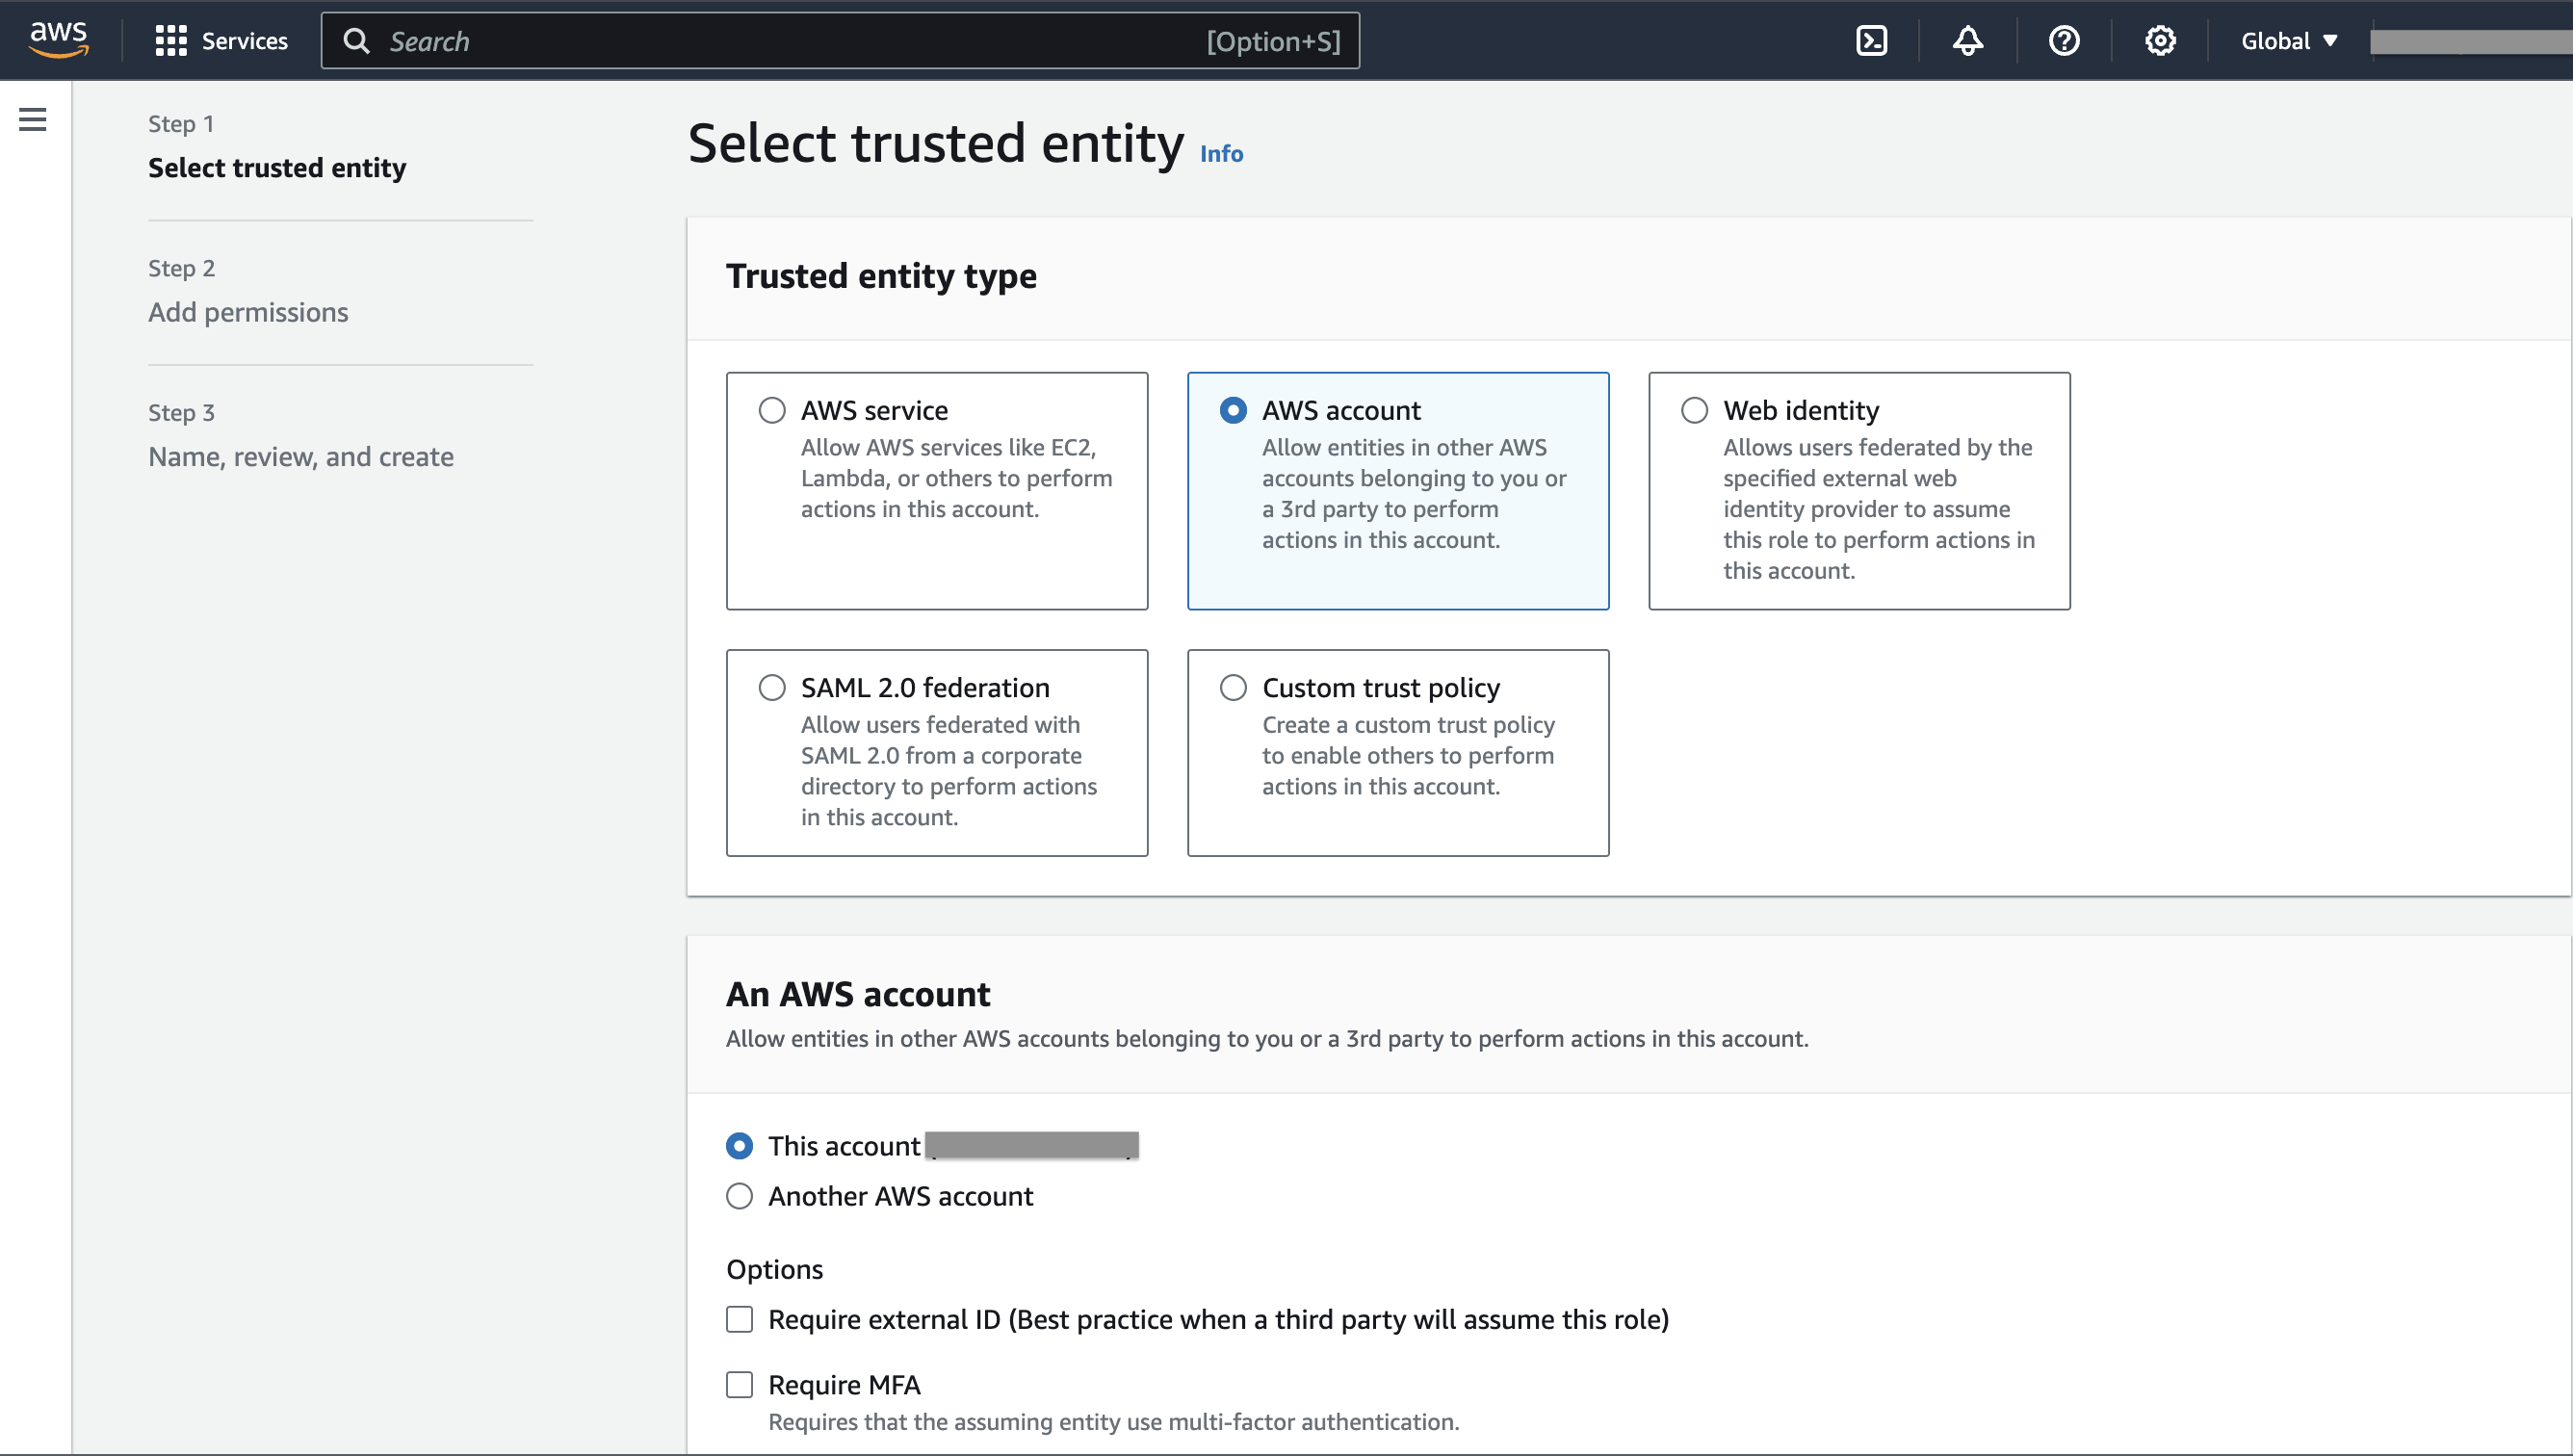
Create a role named
databend-doc-roleon IAM > Roles and attach the policy we created.- In the first step of creating the role, select AWS account for Trusted entity type, and This account (xxxxx) for An AWS account.
- After the role is created, copy and save the role ARN in a secure location, for example,
arn:aws:iam::123456789012:role/databend-doc-role. - We'll update the Trust Relationships for the role later, after we obtain the IAM user ARN for the Snowflake account.
-
Open a SQL worksheet in Snowflake and create a storage integration named
my_s3_integrationusing the role ARN.
CREATE OR REPLACE STORAGE INTEGRATION my_s3_integration
  TYPE = EXTERNAL_STAGE
  STORAGE_PROVIDER = 'S3'
  STORAGE_AWS_ROLE_ARN = 'arn:aws:iam::123456789012:role/databend-doc-role'
  STORAGE_ALLOWED_LOCATIONS = ('s3://databend-doc/snowflake/')
  ENABLED = TRUE;
- Show the storage integration details and obtain the value for the
STORAGE_AWS_IAM_USER_ARNproperty in the result, for example,arn:aws:iam::123456789012:user/example. We'll use this value to update the Trust Relationships for the roledatabend-doc-rolein the next step.
DESCRIBE INTEGRATION my_s3_integration;
- Go back to the AWS Management Console, open the role
databend-doc-role, and navigate to Trust relationships > Edit trust policy. Copy the following code into the editor:
{
    "Version": "2012-10-17",
    "Statement": [
        {
            "Effect": "Allow",
            "Principal": {
                "AWS": "arn:aws:iam::123456789012:user/example"
            },
            "Action": "sts:AssumeRole"
        }
    ]
}
The ARN arn:aws:iam::123456789012:user/example is the IAM user ARN for the Snowflake account that we obtained in the previous step.
Step 2: Preparing and Exporting Data to Amazon S3
- Create an external stage in Snowflake with the Snowflake storage integration
my_s3_integration:
CREATE OR REPLACE STAGE my_external_stage
    URL = 's3://databend-doc/snowflake/'
    STORAGE_INTEGRATION = my_s3_integration
    FILE_FORMAT = (TYPE = 'PARQUET');
URL = 's3://databend-doc/snowflake/' specifies the S3 bucket and folder where the data will be staged. The path s3://databend-doc/snowflake/ corresponds to the S3 bucket databend-doc and the folder snowflake within that bucket.
- Prepare some data to export.
CREATE DATABASE doc;
USE DATABASE doc;

CREATE TABLE my_table (
    id INT,
    name STRING,
    age INT
);

INSERT INTO my_table (id, name, age) VALUES
(1, 'Alice', 30),
(2, 'Bob', 25),
(3, 'Charlie', 35);
- Export the table data to the external stage using COPY INTO:
COPY INTO @my_external_stage/my_table_data_
  FROM my_table
  FILE_FORMAT = (TYPE = 'PARQUET') HEADER=true;
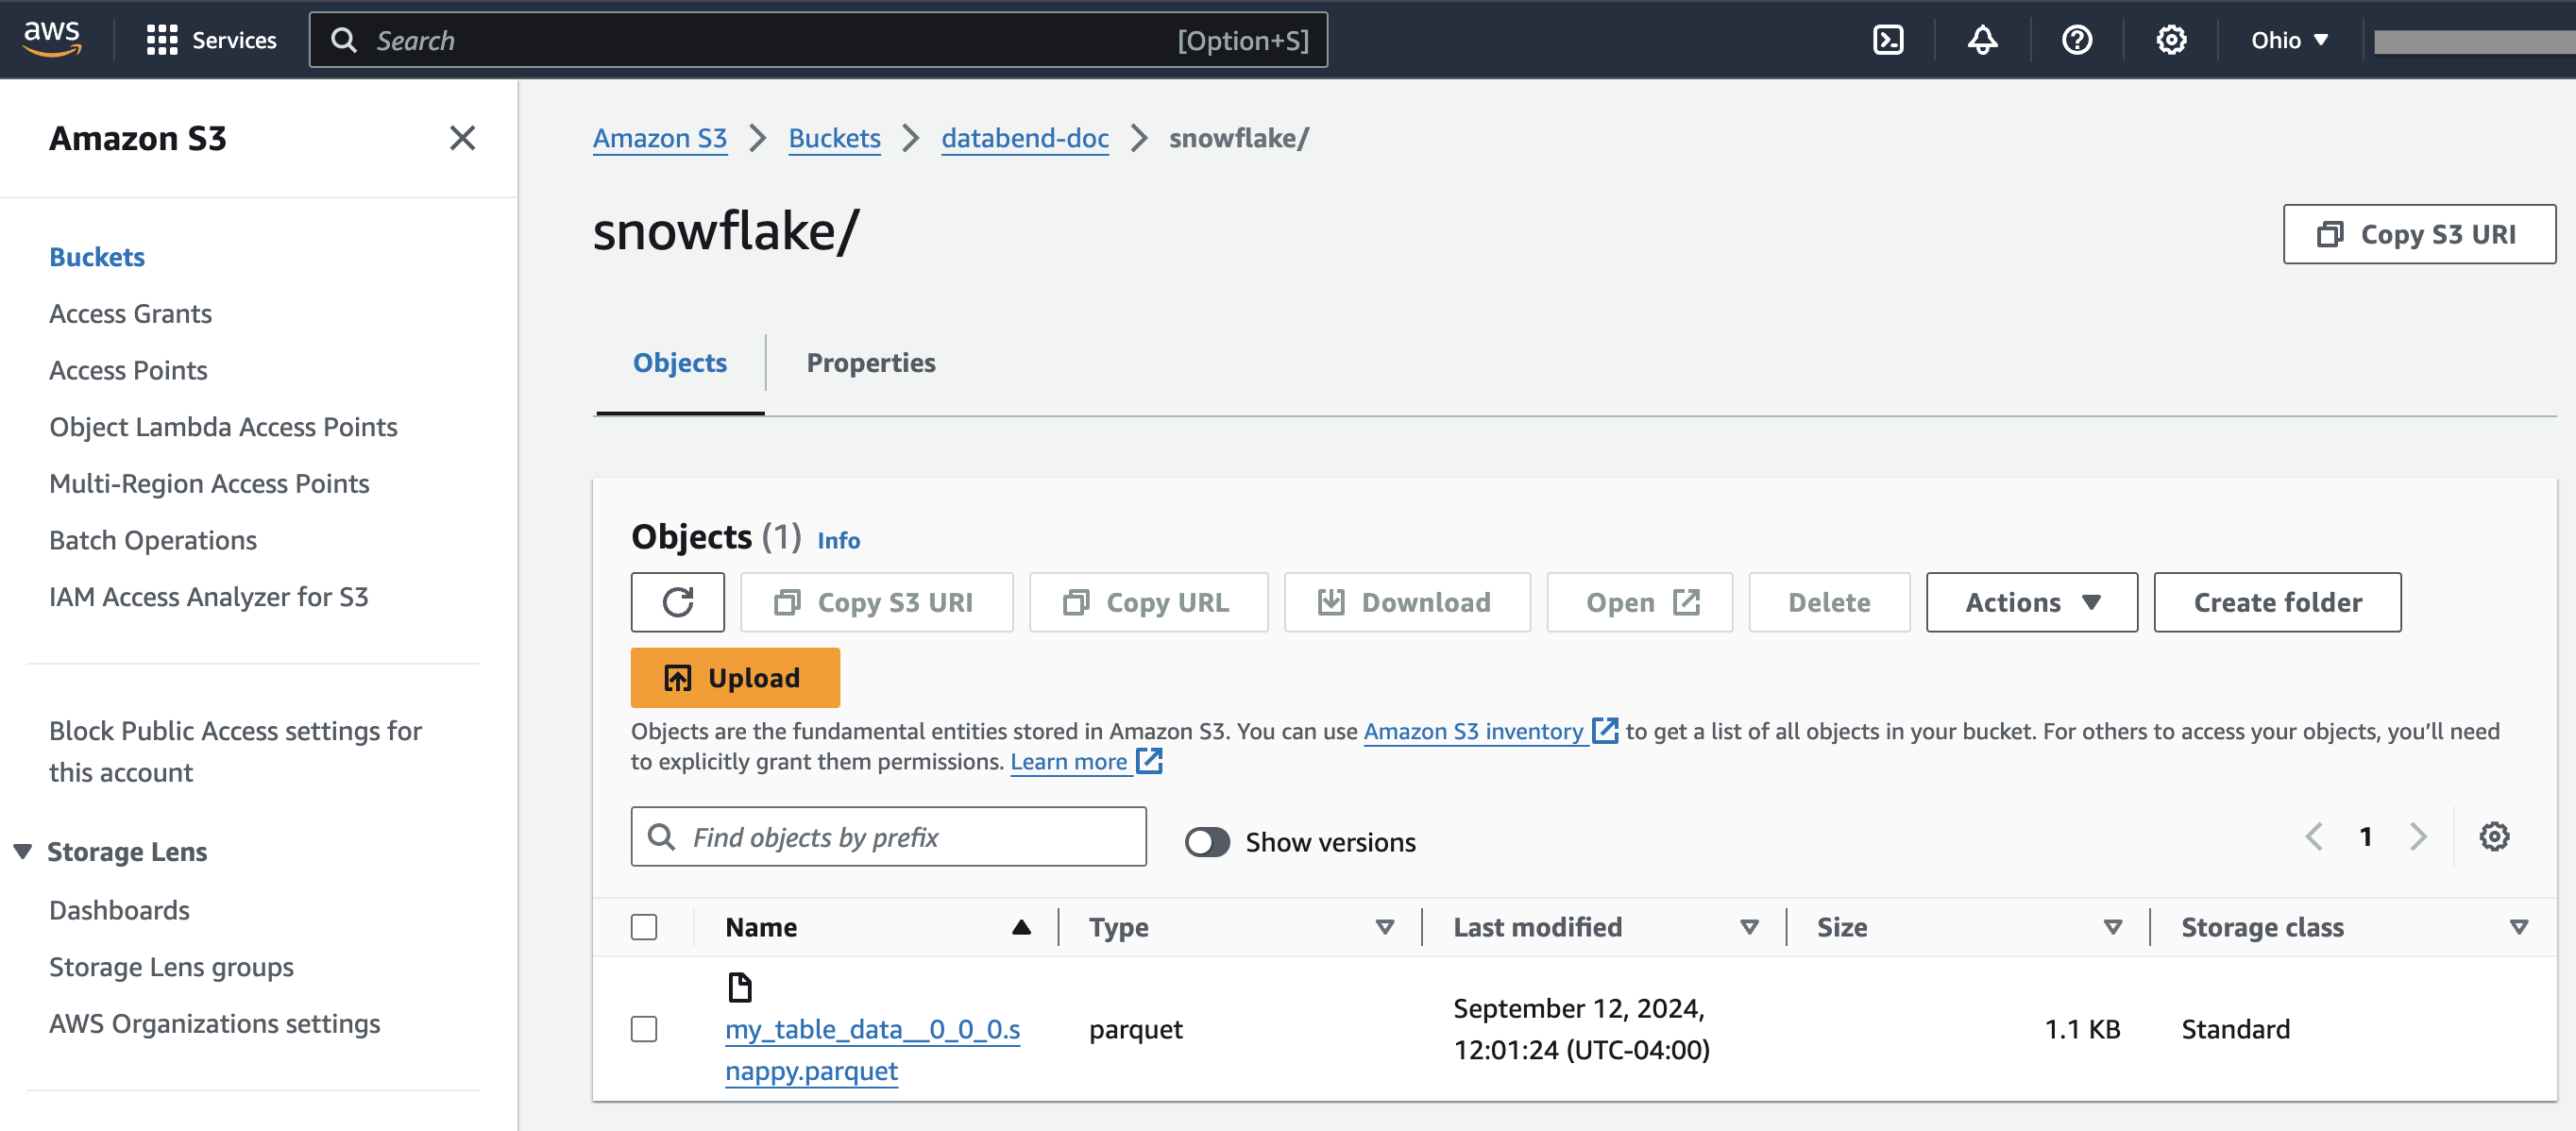
If you open the bucket databend-doc now, you should see a Parquet file in the snowflake folder:
Step 3: Loading Data into Databend Cloud
- Create the target table in Databend Cloud:
CREATE DATABASE doc;
USE DATABASE doc;

CREATE TABLE my_target_table (
    id INT,
    name STRING,
    age INT
);
- Load the exported data in the bucket using COPY INTO:
COPY INTO my_target_table
FROM 's3://databend-doc/snowflake'
CONNECTION = (
    ACCESS_KEY_ID = '<your-access-key-id>',
    SECRET_ACCESS_KEY = '<your-secret-access-key>'
)
PATTERN = '.*[.]parquet'
FILE_FORMAT = (
    TYPE = 'PARQUET'
);
- Verify the loaded data:
SELECT * FROM my_target_table;

┌──────────────────────────────────────────────────────┐
│        id       │       name       │       age       │
├─────────────────┼──────────────────┼─────────────────┤
│               1 │ Alice            │              30 │
│               2 │ Bob              │              25 │
│               3 │ Charlie          │              35 │
└──────────────────────────────────────────────────────┘