Task Flow
Task Flow is Databend Cloud's built-in workflow orchestration feature. It lets you define, schedule, and monitor SQL-based data pipelines as directed acyclic graphs (DAGs). Each node in the graph is a Task — a SQL statement with its own schedule, dependencies, and execution settings. A Flow groups multiple tasks together and manages their execution order automatically.
Overview
Task Flow replaces the legacy Task List with a more powerful model:
| Feature | Legacy Task List | Task Flow |
|---|---|---|
| Single SQL task | ✅ | ✅ |
| Multi-task DAG | ❌ | ✅ |
| Visual graph editor | ❌ | ✅ |
| Version history | ❌ | ✅ |
| Stream-based triggers | ❌ | ✅ |
| Bulk operations | ❌ | ✅ |
Key Concepts
Task
A Task is the smallest unit of work. It contains:
- A SQL statement to execute
- A schedule (manual, interval, or cron)
- Optional dependencies on other tasks or streams
- Advanced settings (failure threshold, result cache, min execution interval)
Flow
A Flow is a named collection of tasks with dependency relationships. Databend Cloud automatically determines execution order based on the DAG structure. A flow has:
- A name and an assigned warehouse
- One or more tasks with defined dependencies
- A lifecycle: Created → Started → Suspended → Resumed → Dropped
DAG (Directed Acyclic Graph)
The dependency graph between tasks. If Task B depends on Task A, Databend Cloud runs Task A first and only triggers Task B after Task A succeeds. Cycles are not allowed.
Getting Started
Creating a Task Flow
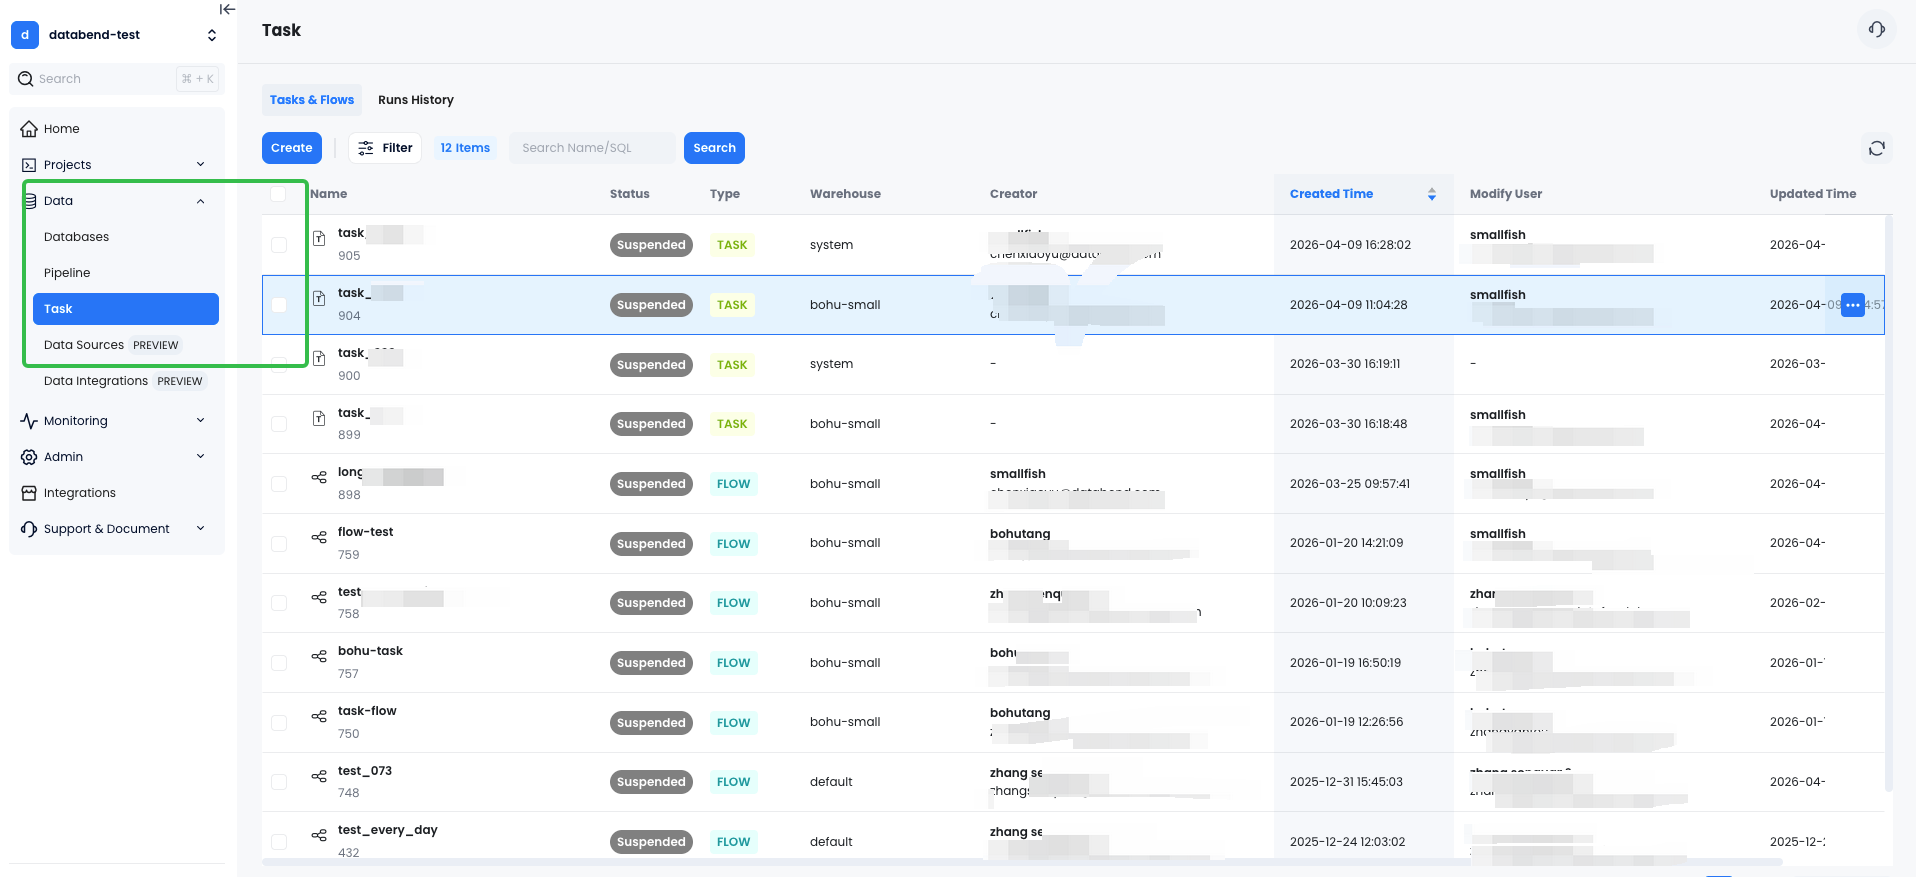
- Navigate to Data → Task & Flows in the left sidebar.
- Click Create in the top-right corner.
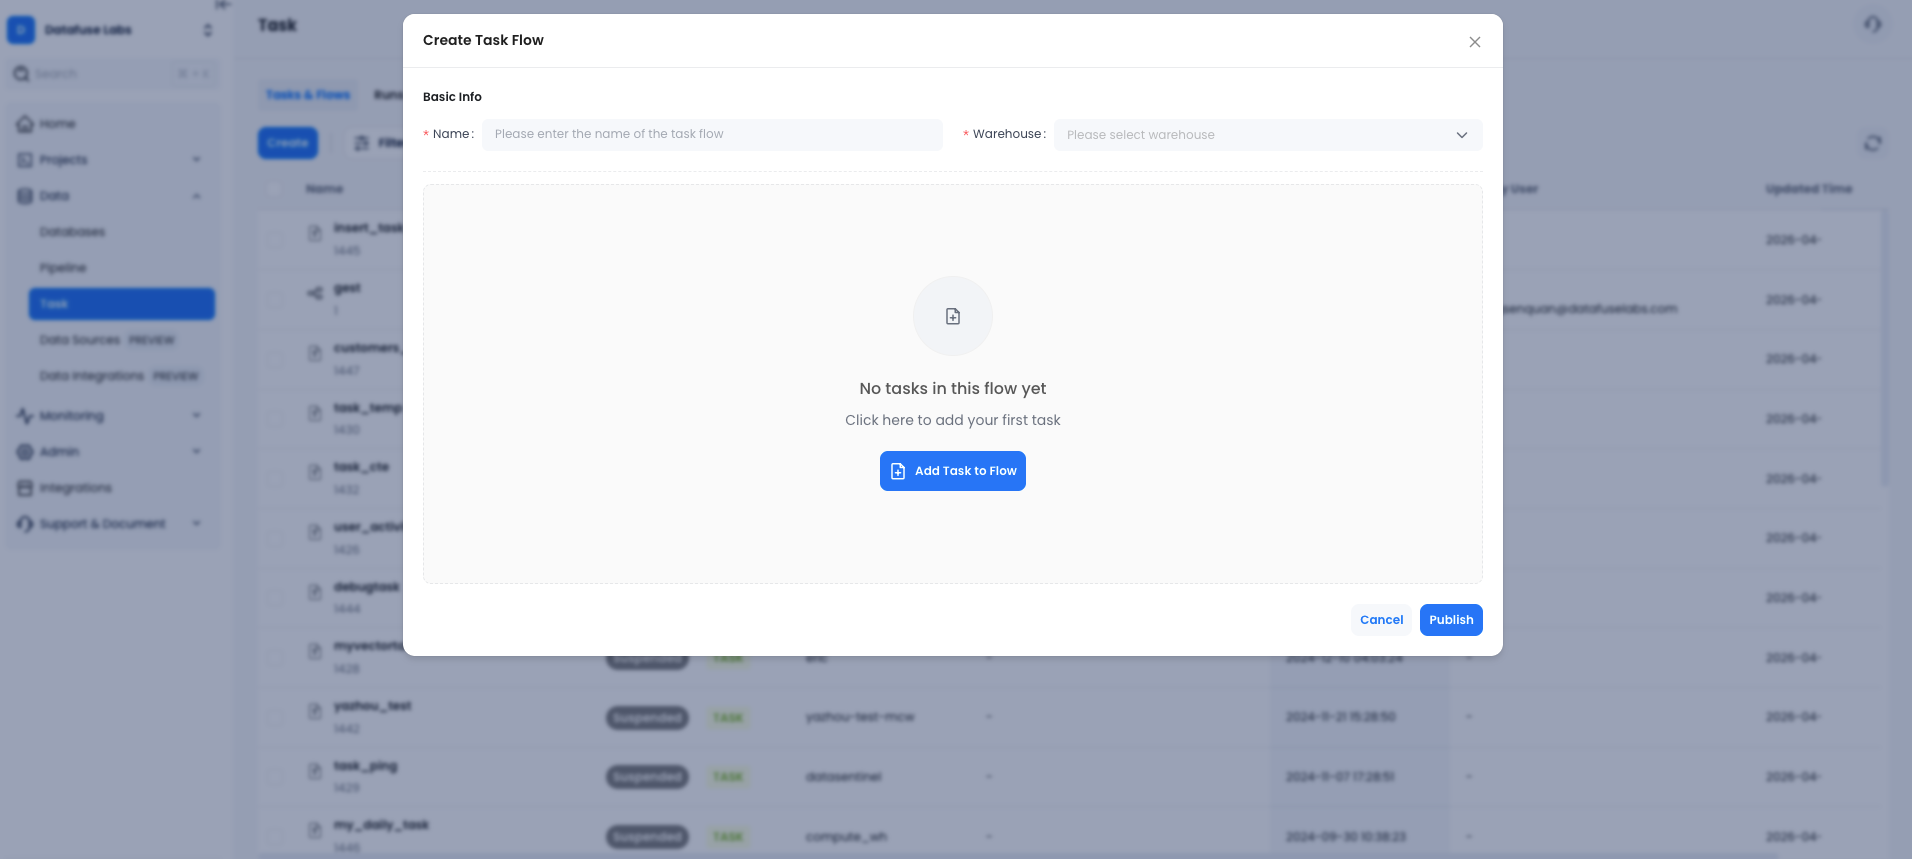
- In the flow modal:
- Enter a Flow Name.
- Select a Warehouse to run the tasks on.
- Click Add Task to Flow to add your first task.
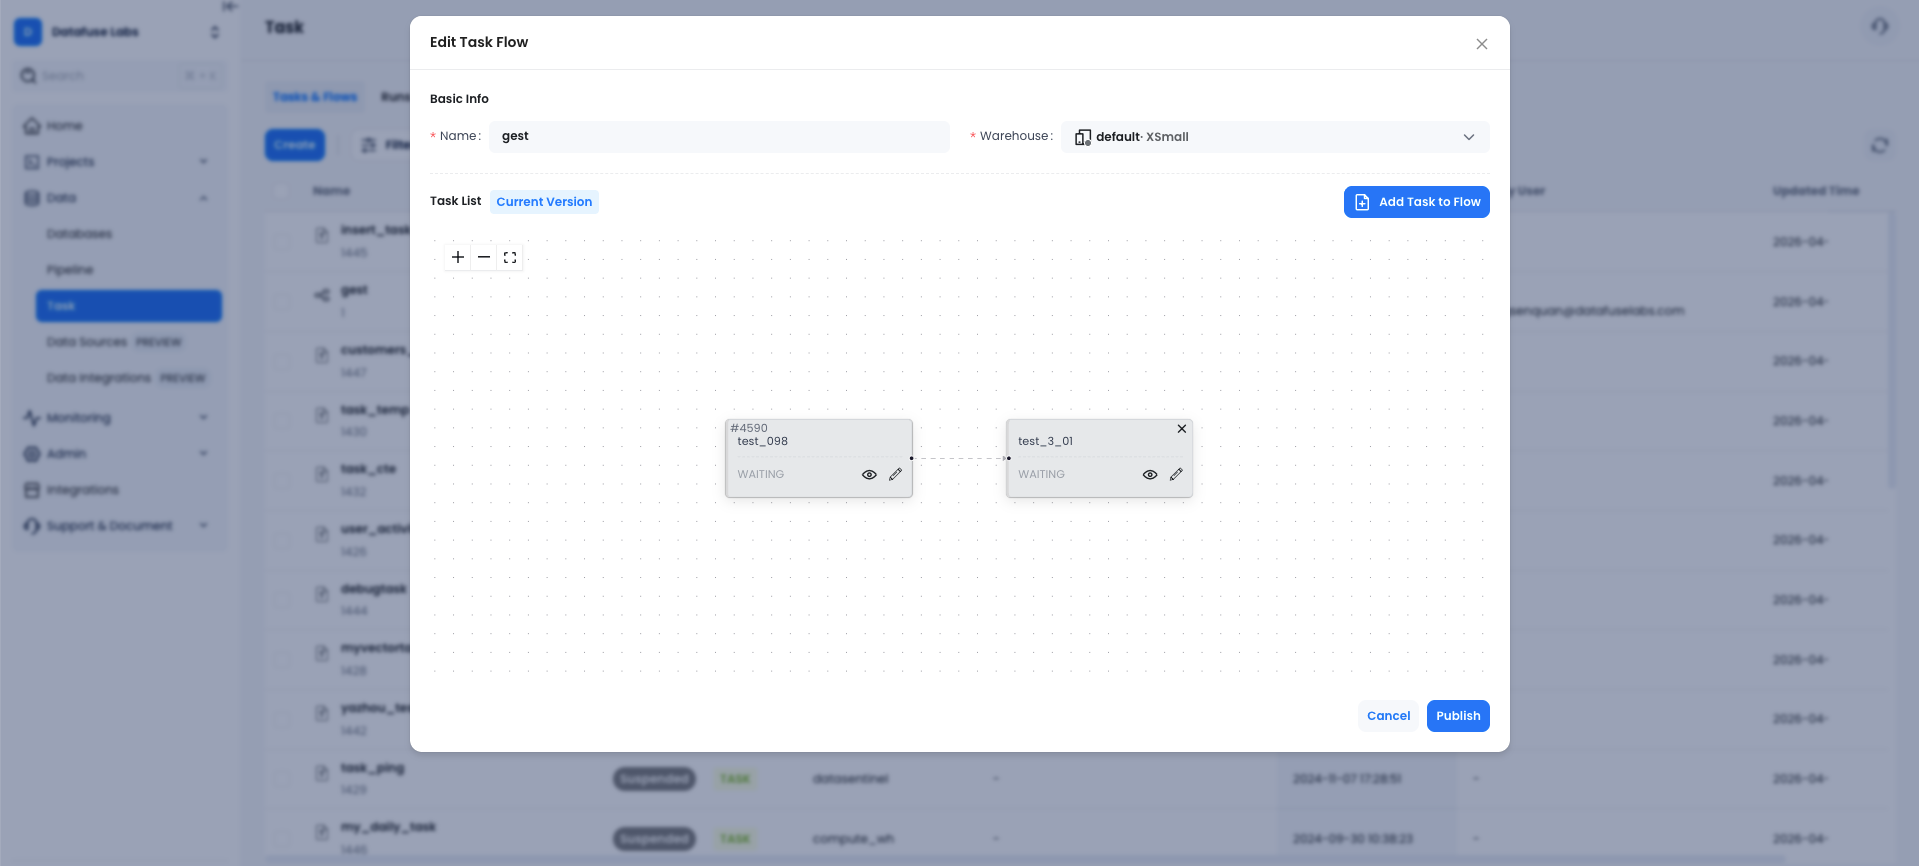
Configuring a Task
In the task form, fill in the following:
Basic Settings
| Field | Description |
|---|---|
| Task Name | Unique name within the flow |
| Schedule | When to run: Manual, Interval (e.g. every 5 minutes), or Cron expression |
| Timezone | Timezone for cron schedule evaluation |
| SQL | The SQL statement to execute |
| Comment | Optional description |
Dependencies
| Field | Description |
|---|---|
| Require Tasks | Other tasks that must complete before this task runs |
| Require Stream | A database stream that must have new data before this task triggers |
Advanced Options
| Field | Description |
|---|---|
| Suspend Task After Num Failures | Automatically suspend the task after N consecutive failures (0 = never) |
| Enable Query Result Cache | Cache query results to avoid redundant computation |
| Min Execute Seconds | Minimum interval between executions (5s / 10s / 15s / 30s) |
- Click Save to add the task to the flow.
- Repeat to add more tasks. Use Require Tasks to define dependencies between them.
- Click Publish to create the flow.
Only account_admin or the flow creator can edit or delete a flow.
Visualizing the Flow
After creating a flow, click its name to open the details page. The Latest Run tab shows the DAG visualization:
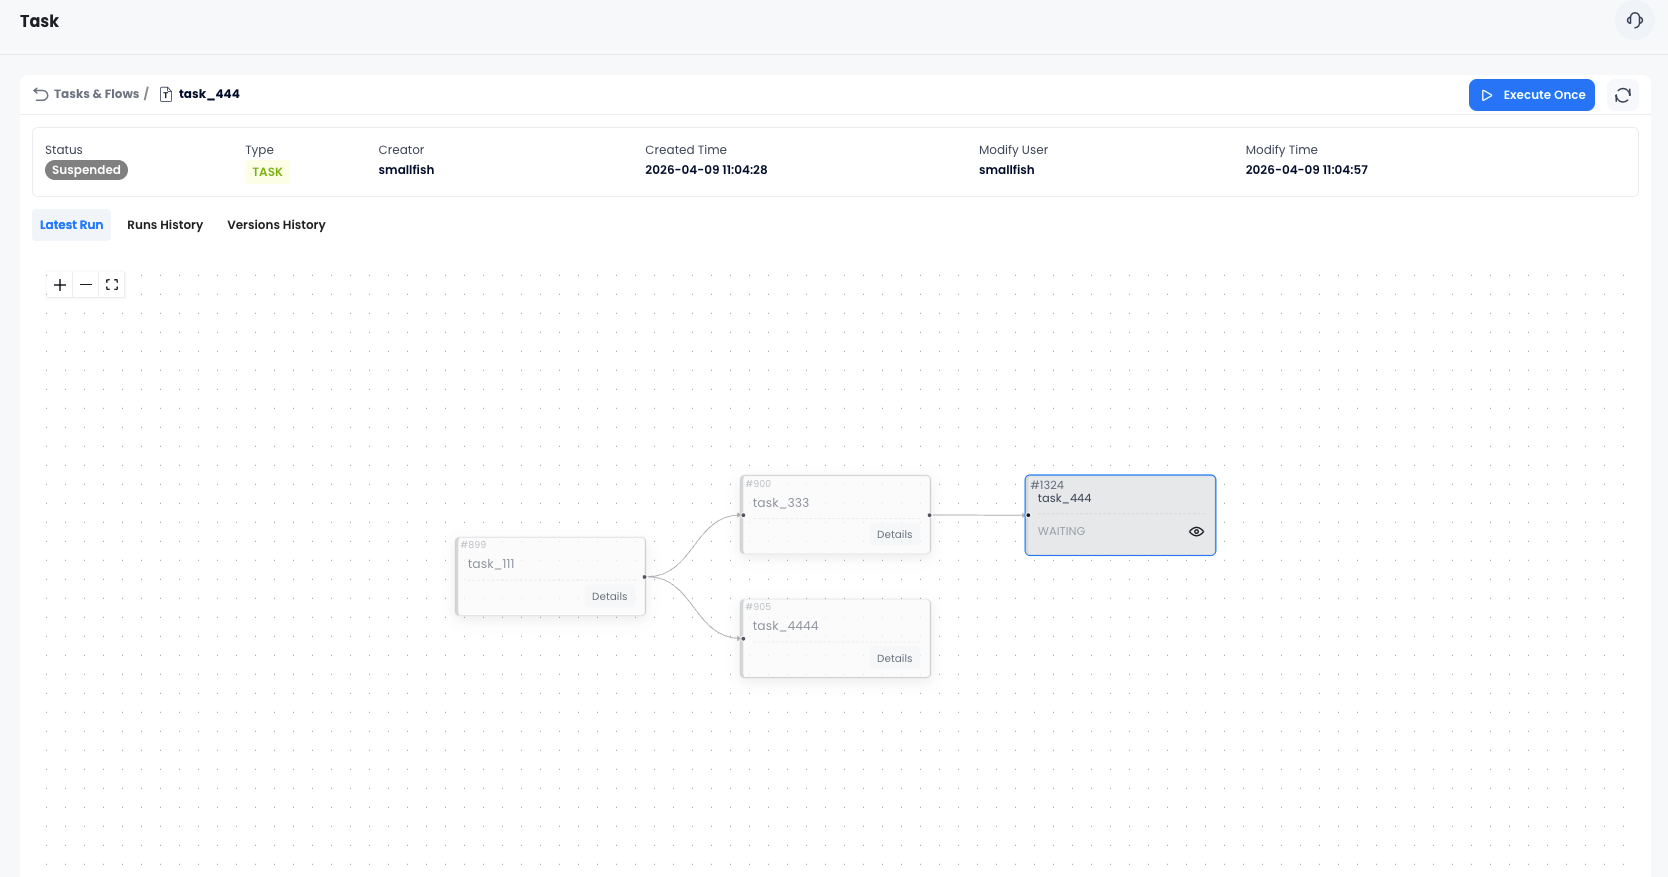
Each node displays:
- Task name
- Latest execution status (color-coded)
- Execution time range
- Error message (if failed)
Status colors:
| Color | Status |
|---|---|
| Blue border | Scheduled |
| Green border | Succeeded |
| Red border | Failed |
| Light blue border | Executing |
| Gray border | Cancelled / Waiting |
Managing Flows
Flow Actions
From the Task & Flows list, each row has an action menu with:
| Action | Description |
|---|---|
| Edit | Modify flow name, warehouse, or tasks |
| Suspend | Pause all scheduled executions |
| Resume | Re-enable scheduled executions |
| Execute Once | Trigger an immediate one-time run |
| View Runs History | See all past executions |
| View Versions History | Browse and compare previous versions |
| Delete | Permanently remove the flow |
Bulk Operations
Select multiple flows using the checkboxes, then use the bulk action menu to:
- Suspend all selected flows
- Resume all selected flows
- Drop all selected flows
Monitoring Executions
Runs History
Click Runs History on the details page to see all past executions:
| Column | Description |
|---|---|
| Task Name | Which task ran |
| Warehouse | Warehouse used |
| State | Scheduled / Executing / Succeeded / Failed / Cancelled |
| SQL | The SQL that was executed (with Query ID link) |
| Scheduled Time | When the run was triggered |
| Completed Time | When the run finished |
| Comment | Task comment |
Failed or cancelled runs show an error tooltip. You can click the error to view details or create a support ticket.
Global Task History
Navigate to Data → Task History to see executions across all flows in your organization. You can filter by:
- Task names (multi-select)
- Time range (Last 2 days, Last 3 days)
Version Control
Every time you publish changes to a flow, Databend Cloud saves a new version. To access version history:
- Open the flow details page.
- Click the Versions History tab.
Comparing Versions
- Select two versions using the checkboxes.
- Click Compare.
- A side-by-side SQL diff drawer opens showing what changed between the two versions.
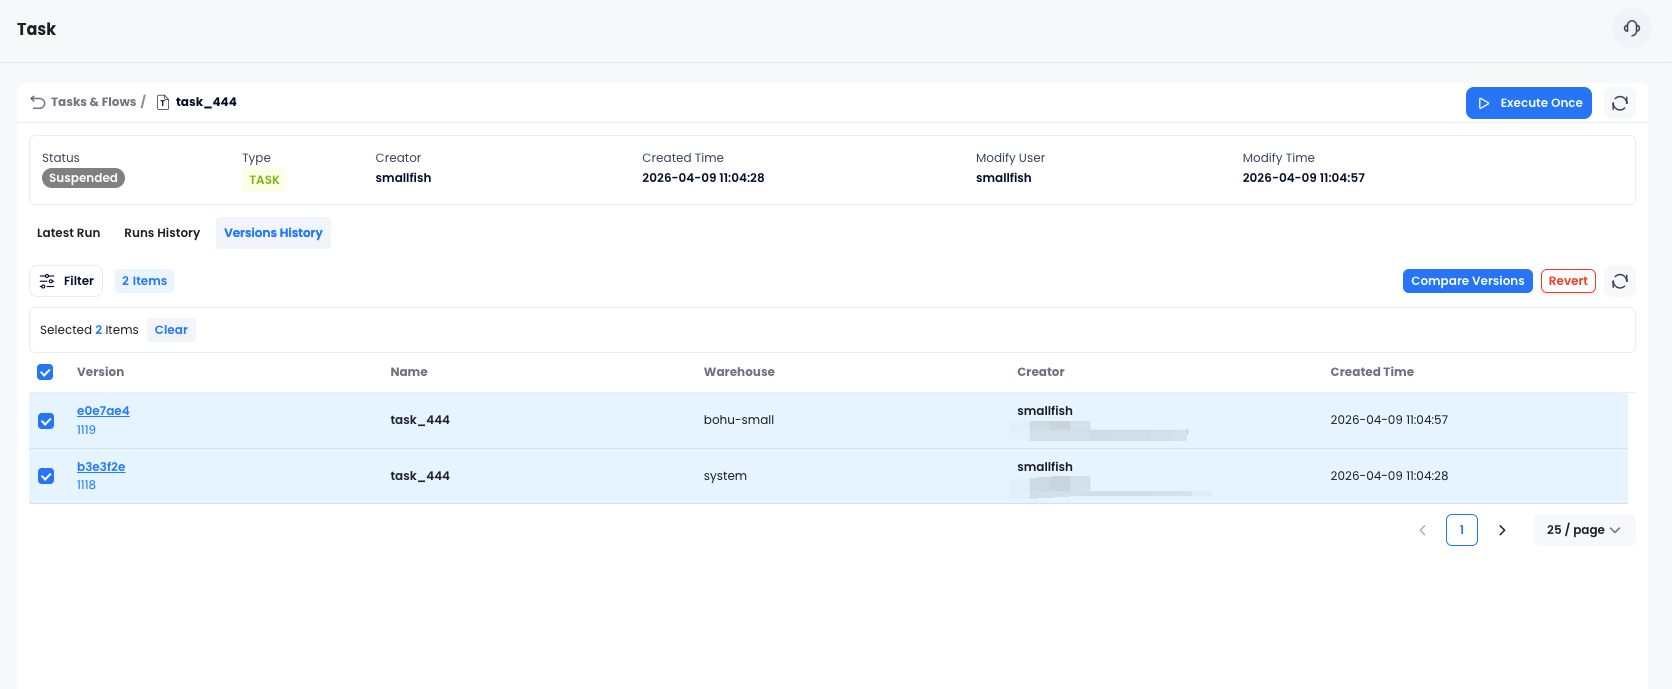
Reverting to a Previous Version
- Select a version from the list.
- Click Revert.
- Confirm the action in the dialog.
The flow is restored to the selected version and a new version entry is created.
Scheduling Reference
Schedule Types
Manual The task only runs when triggered via Execute Once. No automatic scheduling.
Interval
Run every N minutes/hours. Example: EVERY 5 MINUTE.
Cron
Standard cron expression with timezone support. Example: 0 9 * * 1-5 (weekdays at 9am).
Stream-Based Triggers
If a task has a Require Stream dependency, it only executes when the specified stream has unconsumed data. This is useful for building event-driven pipelines that react to table changes (CDC).
Best Practices
- Start simple: Create a single-task flow first to validate your SQL before adding dependencies.
- Use streams for CDC pipelines: Combine stream triggers with
MERGE INTOstatements to build incremental data pipelines. - Set failure thresholds: Use Suspend Task After Num Failures to prevent runaway retries from consuming warehouse credits.
- Enable result cache: For tasks that query the same data repeatedly, enable Query Result Cache to reduce compute costs.
- Use version history: Before making significant changes, note the current version number so you can revert if needed.
- Separate warehouses by workload: Assign heavier transformation tasks to a larger warehouse and lightweight tasks to a smaller one.
Permissions
| Role | Create | Edit | Delete | View |
|---|---|---|---|---|
| account_admin | ✅ | ✅ (any) | ✅ (any) | ✅ |
| Creator | ✅ | ✅ (own) | ✅ (own) | ✅ |
| Other users | ❌ | ❌ | ❌ | ✅ |